If you’re thinking of changing your WordPress site’s permalink structure, you may need to redirect the permalinks. Here’s how to redirect WordPress permalinks without needing a plugin.
WordPress permalink structure is an important contributor to overall user experience. Used well, it can help readers and search engines understand where they are in a site’s structure. Used poorly, it’s just not helpful.
By default, WordPress handles permalinks poorly. The official documentation about customizing permalinks refers to the default permalink as “Ugly Permalink” and notes that it is “not user friendly and also not optimized for search engines.”
A good recommendation from Google is to store pages in a directory structure, to provide a hint about what role each page plays in the bigger picture of the overall website.
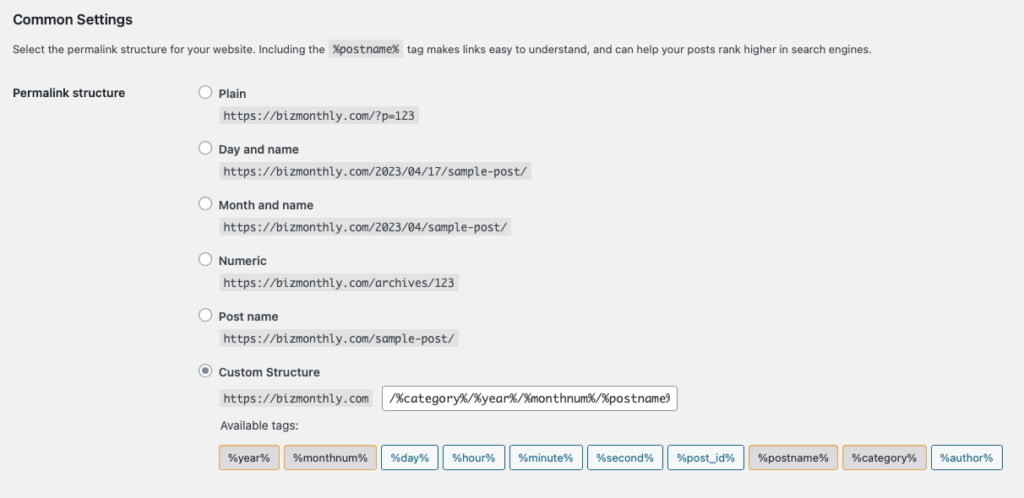
You can use WordPress to make your posts appear like they are stored in a directory structure by choosing a category for each post and by customizing your permalinks to put the category into the permalink structure. Just choose “Custom Structure” and begin the structure with %category%. End it with %postname%, and if you want, put other information in between, like %year%, %month% , %day%. This is also known as “Pretty Permalinks.”
If you didn’t start with pretty permalinks, be sure to redirect
Simply making this change on its own will give you better permalinks, but it may also break existing links to your posts, including those from search engines. If you are beginning to manage an older WordPress site, you likely have lots of posts there that could become “lost” by making this change without using redirection.
You could use a plugin for this, but that’s not the only option.
If you’re using Apache, you can redirect a single post by putting a line in your .htaccess file; you could do multiple posts by putting multiple lines in the file. My hosting environment, managed by Harvey Plum Creative, uses Cloudflare, which has a bulk redirect feature that happens at the edge, and supports uploading of CSV files to inform the redirection.
But with thousands of posts, how do you generate the CSV file for redirection? After much overthinking, I settled on a quick and obvious solution for redirecting the permalinks at bizmonthly.com using Google Sheets and a free plugin called WP Import Export Lite.
Export your existing permalinks from WordPress
- With the WP Import Export Lite plugin installed, it’s really simple to export a list of permalinks.
- From the WP Imp Exp menu at left, choose New Export.
- Under “Choose what to export,” choose “Post”
- Under “Choose Fields,” you’re going to pick which data you want to see in the export file. I left ID, Title, Date and Permalink for myself, so I would have more information to go on when checking the data in Google Sheets, but really all you need is Permalink.
- Optionally, you can type a “Setting Name” and click the save button so you can do this again in the future without having to specify which fields to include.
- At the top right, click “Export”

Importing the data into Google Sheets
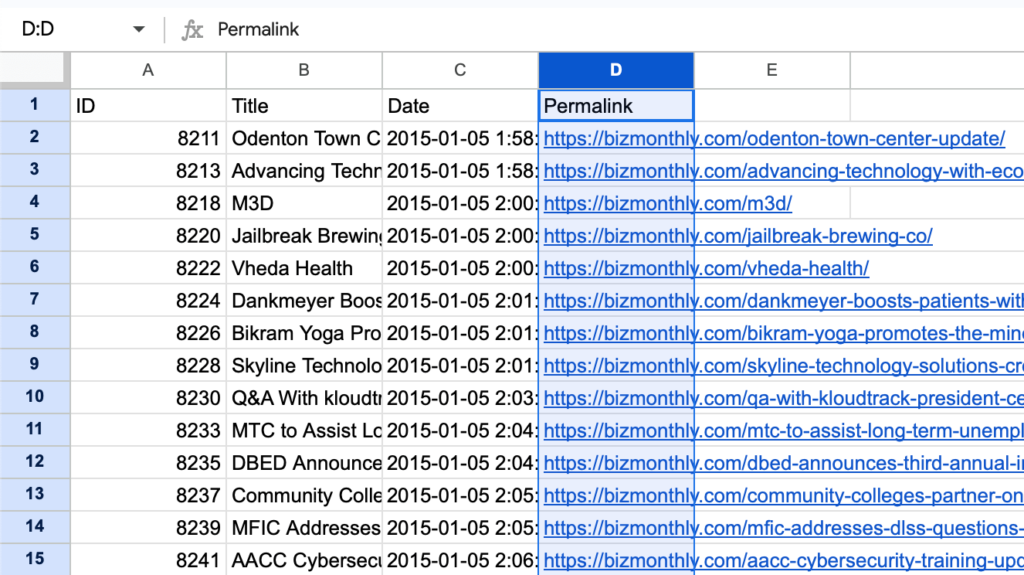
It’s easy to import the data into Google Sheets for organization and manipulation. In a new sheet, choose File>Import, then click “Upload” and use the interface to upload the file you just generated. For the import location, you can choose “Insert new sheet(s),” then click Import data.
Make sure to name the sheet by clicking on its tab. I chose “Original URLs” as the name for this one.
Exporting the new permalink structure from WordPress
Here’s where it gets tricky: you can overthink this as I did, and try to guess at what the new URL will be by exporting all kinds of data about each post and using formulas and functions in Google Sheets to build the future URL you guessed, but it’s really much simpler to have WordPress do this for you, because it’s faster and doesn’t introduce error in forming the new URLs. If you don’t expect a huge amount of traffic to your site, you can just make the permalink change in WordPress and run the same export that you did earlier.
If your site has much more traffic, and you’d like to spend enough time to be careful, consider making a copy of your site, and running the export from the copy. In my case, I did that by using MAMP on my computer, installing WordPress, then using All-in-One WP Migration to migrate the site to MAMP. Then I exported the permalinks.
Importing the new permalink Structure into Google Sheets
Import the latest CSV as you did before. Give the sheet a name that you won’t forget. (I named mine “replacement URLs.”) Check it against the other sheet to make sure it has the same number of rows and everything is in the same order.
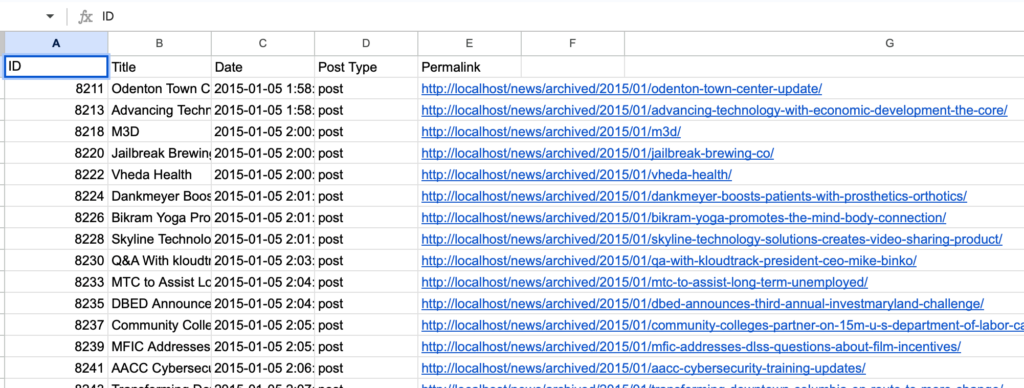
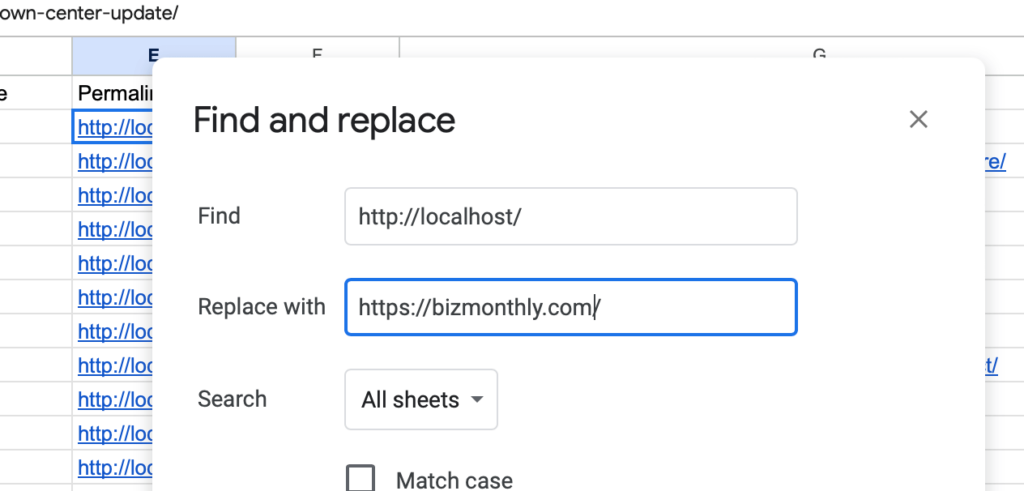
Since I made my target URLs from a copy of my website, all of the new Permalinks start with “http://localhost/.” I have to change that to “https://bizmonthly.com/” instead. Fortunately, Google Sheets does this quickly with Find and Replace. Just choose Edit>Find and replace, type in the relevant information, double-check it, and click “Replace all.”
Likewise, since with my particular setup, it’s better to leave the scheme (https://) off of the front of the URL to be redirected, I need to perform a search and replace on the original URLs. But since Find and Replace works on every sheet, not just the one I am looking at, I need to do it someplace else. You can do it in a new spreadsheet, or in your favorite text editor (I used BBEdit) and paste the results back in.
Prepare a file to redirect WordPress permalinks
Now that all the URLs are checked and formatted properly, it’s time to make a new sheet in Google Sheets by clicking the plus sign at the bottom left. You can name it anything you’d like; I chose “redirect output.”
Since I am using Cloudflare, I need to provide a CSV file in the format they specify. That’s rather simple: Select the column that contains the Permalinks from the first sheet, copy it, then switch to the “redirect output sheet” and paste it into column A. Then copy the Permalinks column from the second sheet, and put it into column B. Check to make sure you copied and pasted all rows. Delete the first row, because it has headers. Then choose File>Download>Comma Separated Values (CSV).
If you’re using Apache, you can use Google Sheets to prepare lines to be copied and pasted into your .htaccess file.
If you use the RedirectMatch method for 301 redirects, You need each line to say something like this:
RedirectMatch 301 /oldpage/ /newpage/How do you do that easily in Google Sheets for thousands of lines? Start by using the CONCATENATE() function in a formula. You can just use &, which is a shorthand form.
Start the formula by typing =”RedirectMatch 301 “&
Click on the original URLs tab, and select the cell that contains the first permalink.
Click back on the output tab, and continue writing the function by adding &” “&
Click on the replacement URLs tab, and select the cell that contains the first permalink.
In my case, my calculation looked like this:
="RedirectMatch 301 "&'original URLs'!D2&" "&'replacement URLs'!E2 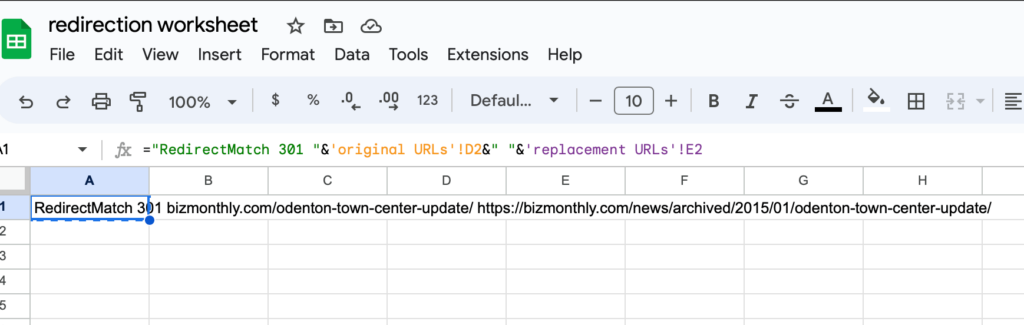
Now you have one such line, but you need one for every redirect.
If you have more than 1000 Permalinks to redirect, first go to the end and tell it how many rows to add.
Select the entire A column by clicking the A, then use the Fill Down command (Mac: ⌘-D; Windows: Ctrl-D).
Voila! Now you have an easily selectable group of lines that you can paste into .htaccess!